Fitting and Final Assembly
Baste the brim at a 1/2" from the edges. Cut notches in this edge just like you did for the outer
edge. Try the brim on. It should fit a little loosely at that basted
line. (Figure to the right.)
If it fits tightly, cut out only 1/4" of material and try again. You
do not want it too big, but repeat this step if it is still too tight.
Continue until you get the fit you like.
Making the Crown
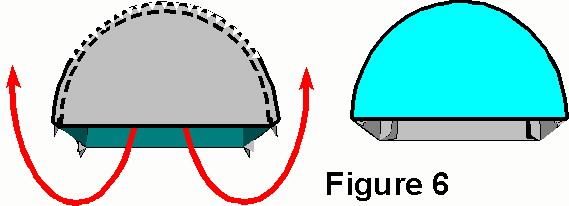
Sew the pieces of the crown together so the right sides of the fabric are
facing each other, and the buckram is facing outside(Figure 5.) Clip the
seam allowance into that sawtooth pattern again and turn the crown right-sides-out
(Figure 6.) Sew the lining togetether, too, in this same manner. (The
pieces illustrated in grey below represent Buckram. You want double layers
for the crown.)

Now, you have two halves to this hat: the brim assembly and the crown
assembly. Both of these halves should be right sides out. Line up the holes
and pin them together, being careful not to pin the crown down. Baste
the brim and crown assemblies together. If the crown buckles a little on
the sides (Figure 7,) 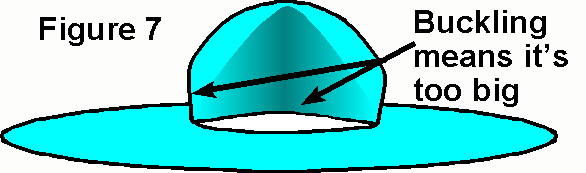 when
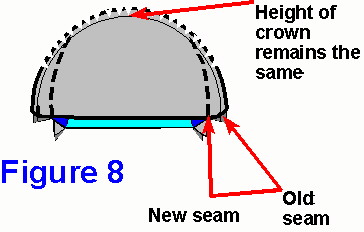
you slip it into the hole in the brim, then you have to take in the seams
a little at each corner, without altering the height of the crown, until
it fits neither with buckling, nor with gaps from being too small (Figure
8.) You should be able to fit the crown into the hole, and completely conceal
the sawtooth edge of the hole. You will size the lining the same way, then
set it aside to topstitch in later. Once you have the fit right,
pin the crown in place and sew it onto the brim.
when
you slip it into the hole in the brim, then you have to take in the seams
a little at each corner, without altering the height of the crown, until
it fits neither with buckling, nor with gaps from being too small (Figure
8.) You should be able to fit the crown into the hole, and completely conceal
the sawtooth edge of the hole. You will size the lining the same way, then
set it aside to topstitch in later. Once you have the fit right,
pin the crown in place and sew it onto the brim.
Take a moment to look at your sewing machine. Most machines have a "free
arm", which means that you can stick the bottom part of the sewing machine
into things like sleeves and pant legs, so you can sew them properly instead
of sewing them shut. Sometimes, there is a part of the machine that you
have to remove to get the "free arm" to work. Please do this now, because
you are going to sew the two halves of your hat together using the "free
arm"`of your machine.
Stick the "free arm" into the hole and sew along the final seam line,
1/2" from the inner edge. Also, zig-zag the edge between the seam and the
notches you cut out earlier, to keep the fabric from unraveling at the
seam. Fold the raw edge of the lining under 1/2" to finish the edge, and
sew the inner hat band (if you chose to use one) onto it. Then topstitch
the lining into the hat, concealing the raw edges of the hole and crown.
Top of Page
Back to Page One: Step One
Back to Page Two: Setting Up the Pattern
LBack to Page 3: Laying out the Pattern and
Sewing
Finishing Touches