Setting Up the Pattern
Start Customizing
This pattern consists of:
-
Two round rings of fabric and buckram each.
-
Two semicircles of fabric, Two of lining, and four of buckram.
-
One rectangular stip of fabric, two of lining, and two of buckram.
Unlike the Tudor Flat Cap, the previous project, this hat requires no set
patterns for you to print. All you need is a compass, which can be easily
made with a push pin, a length of string, and a pencil or marker.
-
First, use this compass to make a circle 21" in diameter on the pattern
paper, which will be the pattern for the brim and its interfacing.
-
Second, measure the span from the tip of one of your ears to the top of
your head (sometimes this measurement will
 match
closely the length of your hand, by the way Somethingto keep in mind when
you do not have a measuring tape.) Take that measure ment, add 1" for seams,
and draw a semicircle on the pattern paper, for the sides of the crown
and their intefacing. You can make this bigger if you want, to make a higher
crown.
-
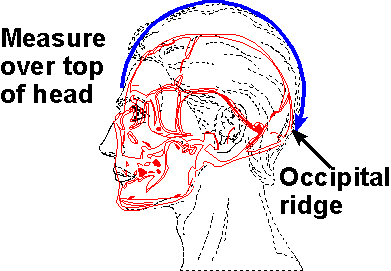
Third, measure your head from right above your eyebrows, over the top to
the occipital ridge on the back of your head, (that spot right where the
flesh of your neck meets the back of your skull,) then cut a rectangle
1"longer than that length, and 5 "wide. This is the center of the crown
and its interfacing.
Here are two makeshift ways to measure your head for the hole in the brim.
-
Measure the length and width of the hole in a hat that fits
you well (A cowboy hat, a straw hat, or the like is better than a baseball
cap, as the cap is too flexible for an accurate measurement.) Most heads
are elliptical, shaped like a squashed circle, when seen from the top.
So you have to get both measurements.
-
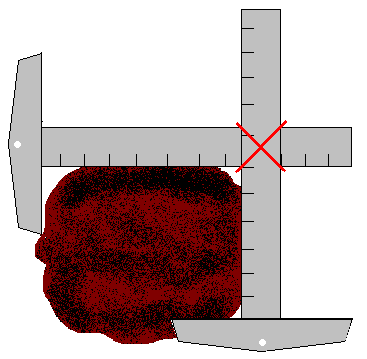
Have someone measure your head with a couple of T-squares or calipers.
(See illustration.)
 Now,
you have to make a hole 1" smaller than these dimensions, since we are
allowing a 1/2" seam allowance. That means it should fit exactly snug when
you sew the crown into the brim, and take up that seam allowance. But that's
described later. Just cut the hole smaller now.
Top of Page
Back to Page One: Step One
Laying out the Pattern and Sewing
Fitting and Final Assembly
Finishing Touches
 match
closely the length of your hand, by the way Somethingto keep in mind when
you do not have a measuring tape.) Take that measure ment, add 1" for seams,
and draw a semicircle on the pattern paper, for the sides of the crown
and their intefacing. You can make this bigger if you want, to make a higher
crown.
 Now,
you have to make a hole 1" smaller than these dimensions, since we are
allowing a 1/2" seam allowance. That means it should fit exactly snug when
you sew the crown into the brim, and take up that seam allowance. But that's
described later. Just cut the hole smaller now.